Ever wondered what the deal with wood wall panels is? At one time, not so long ago, they were synonymously associated with outdated decor, and most homeowners wouldn’t even think about entertaining the idea of putting wood meant for the floor on their beautiful walls. But all that has changed!
Nowadays, it’s becoming more and more of a popular and hip trend to panel an accent wall, or an entire room, with wood planks you’d normally reserve for underfoot. The great news is that these woody friends are actually pretty easy to install, so if you’re a DIYer, you can add wood panel walls to your list of home décor projects if they strike your fancy. Now, you can add some stunning wall charm to any room, even on a budget.
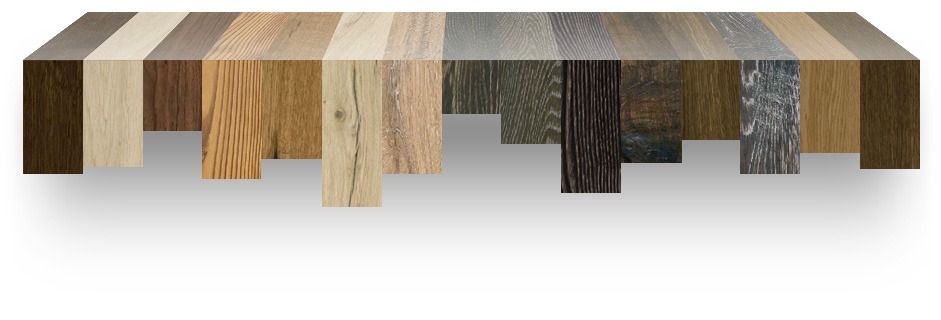
Now, we know you might already be thinking that putting up wood paneling may restrict your options when it comes to decorating that wall, but it doesn’t! You will still be able to hang things on the wall with ease with the use of adhesive hangers rather than nails or screws. As long as you take proper care of your new wood paneling walls, they’re sure to stand the test of time, stay shiny, and spruce up any room in your home. As always, Hardwood Bargains offers lots of choices for your wood panels made of real hardwood.
So, which wall (or room) do you have in mind for your next wall wood paneling project? No rush! While you’re thinking about that, here are some aspects of wood walling to consider when determining the best fit for your dream home.
You Can Put the Walling Almost Anywhere
Hardwood Bargains’ wood walling products come with a peel and stick adhesive backing that can stick to any flat surface, including any type of wall or even a ceiling. We like to keep it simple and easy for all our DIYers. This means you simply just peel and stick the planks down, and you’re all set. No messy glue or nails involved. The main thing you have to do is measure and then use a leveler to ensure all your wood planks are properly aligned on the designated wall. For your utmost convenience, the planks also have interlocking parts that are easy to assemble. The products are made with a thick multi-ply construction to ensure the planks will lay flat and secure against any wall or ceiling.
The only places you can’t put wood paneling is over walls on metal stud framing, exterior basement walls, or over sloping walls. Everywhere else is fair game, even over wainscoting! Who knew you had this many options, right?
Determine How Much You Need
If you’re wondering how to calculate how much hardwood walling you’ll need, you obviously just need to measure your wall, which can usually be done with a simple calculation of length times width. Then add an extra 5% for any possible mishaps, accidents, or waste cuts. As with almost all home décor, there are a ton of options to choose from, which makes it easy to find something that works with your style and your budget. Whether you choose to match your flooring or to contrast, Hardwood Bargains has a wide selection of options that can take your wall from blah to fabulous!
Installing It Yourself
It’s recommended, as with all wood products, to install your wall wood paneling in a climate-controlled environment, so you need humidity and temperature controls. The walling will need to acclimate to your home’s humidity levels before installation, so it’s best to allow a few days for this process to happen. You don’t want your wonderful new wall (and all your hard work) to warp and crack from a sudden increase in moisture levels!
So, how do you get started? First, wipe down your papered or painted wall thoroughly, and if the paint is glossy, you may want to use sandpaper to slightly roughen the surface to help the adhesive better grip your existing wall. If you’re adding the hardwood walling in a newly constructed area, it’s best to use plywood for your walls instead of drywall to ensure a smoother installation process. This choice can also prevent damage if you decide to remove the wall paneling later on.
When it comes to the actual installation, you’ll want to make sure you have all the necessary materials. That includes a leveler, pencil, tape measure, saw, finish nailer, finishing nails, rubber mallet, and floor roller. Make sure your surface is clean, flat, and dry, and remove light switch covers, scrape off loose pieces of wallpaper, and wipe down the surface completely.
If you’re just using the adhesive on the back of each plank, use a leveler and a pencil to make a straight line on the wall. Take off the adhesive backing and put the boards on the wall, being careful to keep to the line you marked out. Use your rubber mallet to ensure that the adhesive firmly sticks, so your planks won’t fall off later. Between each row, stagger your pieces by at least 6 inches for a more natural look, and be sure to leave an approximately 3/8” expansion gap between the last row and the ceiling to allow for the wood to naturally expand and contract, within reason, as moisture levels change in your home. Finally, if you spot any gaps, you can use quarter round to finish off your wall’s stunning new look.
If you’re worried that the adhesive won’t be enough, it’s totally understandable. You can face nail or blind nail all the planks throughout the installation to be sure that they will last for many years to come. It’s not recommended to nail less than 6 inches from the ends of each plank. Attach planks every 12 to 14 inches, and if you’re installing a product that is tongue and groove, use a blind nail at a 45-degree angle through the tongue. You should also go over the finished product with a rubber mallet to make sure your walling has a strong bond with the backing. And that’s it – you’re done!
Wall Maintenance
Once you have your amazing new wall, you’ll want to know how to take proper care of it and make sure it lasts a good long while, so you can get the best return on your investment. Any spills or spots should be blotted up immediately because liquid can penetrate the wood and cause warping. You should also clean the walling periodically with a recommended hardwood cleaner or use distilled water to lightly spray on and wipe off with a rag for daily polishing. Tap water can leave an unsightly film over the wood panels, so avoid using that.
Never use wax, polish, oil soap, steel wool, abrasive cleaners, or steam cleaners, which can all cause discoloration, warping, and other damage to your beautiful new wall wood paneling. Of course, avoid other types of damage like gauges or cuts from sharp objects or dents from heavy objects colliding with the wall. It’s also smart to rearrange decor on the wall at regular intervals, so the wood ages evenly.
Once you’ve considered these tips and decided to pursue installing a hardwood wall, you can check out all of your options to see what fits your aesthetic needs and desires. An accent wall to brighten a room or an eye-catching bit of color for a dramatic entryway can be just the thing you’ve been looking for to tie together your décor.
You can also panel an entire room with a more neutral wood with a subtler grain to match or contrast your floors and provide the perfect background for displaying your paintings or set the scene for either a cozy den or a sophisticated library. With wall wood paneling, the options are endless, and the results are sure to impress!
Sources
https://www.thespruce.com/wood-wall-paneling-alternative-1822880
https://www.mymove.com/home-inspiration/decoration-design-ideas/modern-ways-use-wood-paneling/
https://www.moving.com/tips/17-items-that-require-climate-controlled-storage/